
Ruby procedure guide
This guide covers standard, subdermal installations for which the process is known and reliable. It assumes prior experience with subdermal implants and will focus on the ruby's specificities.
Preparation and tools
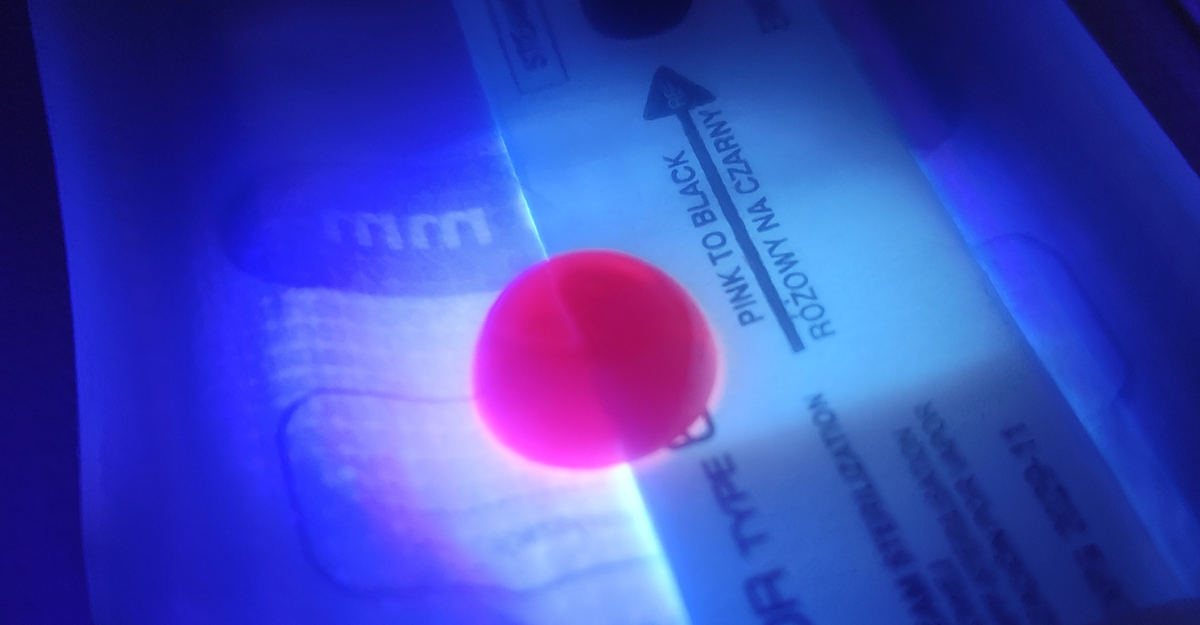
Any implanted ruby should be sterile. Make sure the packaging it came in is not damaged. The ruby does not require any further preparation.
The guidelines for picking a spot are similar to silicone implants but keep in mind rubies are hard and won't bend. Hence, avoid proximity to bones, joints, or areas with frequent impacts or pressure, as they might create discomfort.
The procedure
Proceed like you would with a silicone implant, with some small differences:
- Be careful not to scratch the ruby with your tools; ideally, handle it with your gloves only. Scratches could create safe hiding places for bacteria inside the body, leading to biofouling.
- The rubies are smooth and circular. They will tend to migrate (move) within the space they are given, so take that into consideration when choosing the direction and size of your pocket.
- Remember to apply pressure to remove any trapped air from the pocket before closing it. Trapped air can take a long time to go away and may be painful.
Aftercare
Nothing particular about the aftercare in this case. Stitches are strongly recommended, especially for larger ones. Care for the wound like any other one and avoid movement, pressure, or impacts during the entire healing period.
Due to swelling and blood accumulation, the implant might be invisible or hard to spot for a while, but eventually the skin will tighten and conform to it.
Will it glow?
Yes, but manage your expectations:
Here is the theory. Ruby does emit a very noticeable pink-red halo when exposed to strong light, especially under UV, violet, and blue light, and even green if sufficiently strong. The effect is quite mesmerizing and makes for a beautiful demonstration when dealing with gemstones.
Now let's put this in context. Your ruby is under a layer of skin (notorious for protecting your body from UVs), so we have to shine a pretty strong light through the skin at the ruby without lighting up the area so much that we drown the actual glow of the ruby itself.
For that, we recommend using a laser in the range of 405-532nm (Blue/Violet to Green DPSS), which are relatively easy to find. This mostly works on larger rubies, as the sub-centimeter ones tend to be obscured by the laser itself and the skin's glow.

Risks
No matter how clean and well-done, an implant poses a risk of infection and/or rejection. Consult a medical professional if you have any doubts.
We are aware that due to regulations or a general apprehension of body mods in your area, medical professionals might refuse to deal with implants or be intentionally or unintentionally unhelpful. In such cases, seek advice and help from your installer, the powder vendor, or experienced community members. Do not let a failed install degenerate.
Disclaimer: All guides, information, and advice provided by Abyss Walker are for informational and educational purposes only. Nothing published by Abyss Walker should be considered encouragement or endorsement of self-harm, unsafe practices, or illegal activities. Body modification procedures carry inherent risks. Any actions taken based on the information provided are undertaken entirely at the reader's own risk. Abyss Walker and its collaborators accept no responsibility or liability for any injury, loss, damage, or other consequences resulting from the use or misuse of this information.